.png)
.png)
Many users assume that just because Xero is a New Zealand based company that the accounting software cannot work in Switzerland. The most cited reason is because you can’t configure VAT.
This article will help explain to you how to set up VAT in Xero properfly.
Introduction
Value Added Tax (VAT) is an essential aspect of business accounting, ensuring that businesses collect and remit the appropriate taxes to the government. If you're a business operating in Switzerland and using Xero as your accounting software, this article will guide you through the process of setting up Swiss VAT on Xero. With accurate VAT calculations and reporting, you can maintain compliance and streamline your financial processes. Let's dive in!
Step 1: Activate VAT in Xero
- To begin, log in to your Xero account and navigate to the "Settings" menu.
- From there, click on "Advanced Settings" and select "Financial Settings."
- Make sure Tax exclusive is set For Sales and For Purchases
- Set the tax period 3 Monthly to reflect a quarterly filing for VAT

Step 2: Create VAT Tax Rates
Next, you need to create VAT tax rates specific to Switzerland.
- Go to "Settings," select "Advanced Settings," and choose "Tax Rates."
- Click on "Add Tax Rate" and enter the required details.
- For Swiss VAT, the standard rate is 7.7%, and there are reduced rates for certain goods and services. Consult with a tax professional or refer to Swiss tax regulations to determine the correct rates for your business activities.
- It is important to set both input and output VAT in Switzerland and also added the code
- Below are the tax rates we typically set up for base clients. Be sure to always add the tax code for reference.
- Save the tax rates once you have entered all the necessary information.
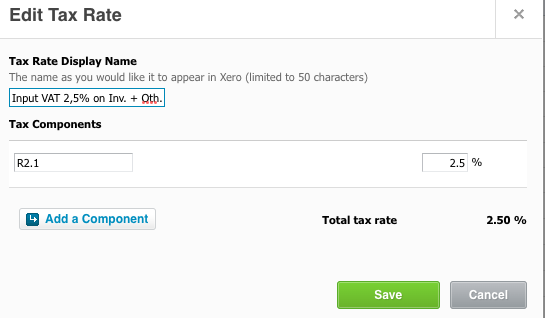
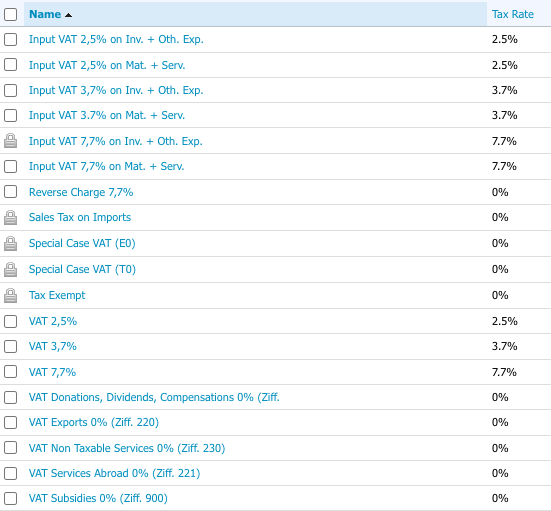
The above input VAT rates + reverse charge for output and input. You will the same VAT rates listed twice but the wording is different showcasing either "Mat. + Serv." and "Inv. + Oth. Exp". The difference between the two is explained below.
- Mat. + Serv - For this category, you may receive an invoice from a vendor and this invoice is directly related to revenue generation. The invoice would typically be placed in an direct cost or cost of goods sold account at which point the VAT would fall in this category category.
- Inv. + Oth. Exp. - For this category, you may receive an invoice from a vendor and this invoice has no direct contribution to revenue generation. The invoice would typically be placed in an expense account at which point the VAT would fall in this category category.
Why we separate these two is because on the VAT form there is a section for "Mat. + Serv." and a section for "Inv. + Oth. Exp". Below you can take a look at output VAT set ups.
Step 3: Be aware of VAT Reverse charge
You should notice that the VAT reverse charge is set to 0% although the name states 7.7%.
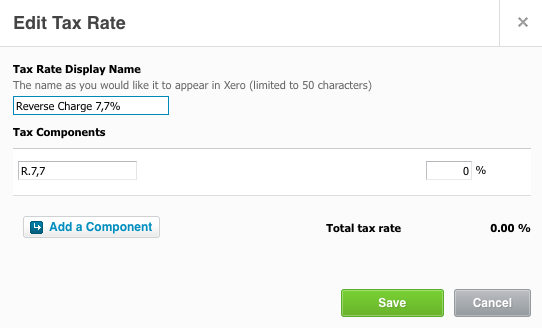
In the report you will produce at quarter end in excel, you will need to apply 7.7% on all transactions requiring VAT Reverse charge and add this to both your input and output VAT return to offset each.
Step 4: Apply VAT Codes
With the setup complete, you can now apply VAT to your transactions.
- When creating invoices, quotes, or bills, select the appropriate VAT code you assigned in Step 3.
- Xero will automatically calculate the VAT amount based on the tax rate associated with that code.
- Ensure that you select the correct VAT code for each transaction to maintain accurate records.
- Ensure that you check whether the invoices are inclusive or exclusive of VAT. Sometime VAT is included in the price and sometimes it is excluded. Be aware of this and choose the right option in Xero.

- When applying VAT Reverse Charge always ensure that Amounts are Tax Inclusive on the invoices.

Step 5: Generate VAT Reports
Xero provides various reports to help you track and monitor your VAT obligations.
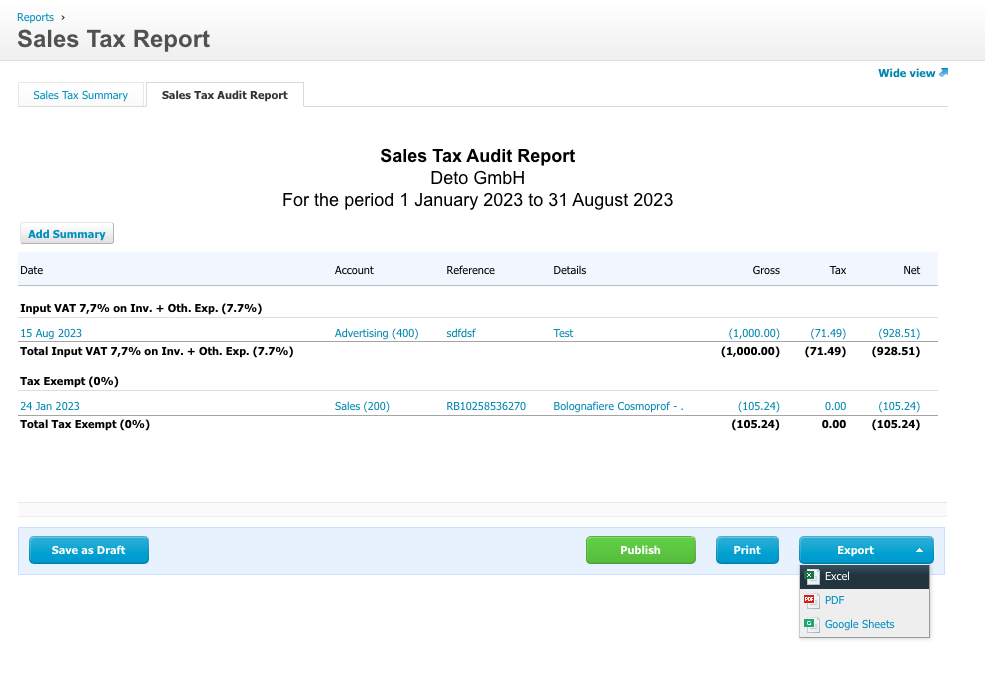
- To generate VAT reports, go to the "Accounting" menu and select "Sales Tax Report"
- Customize the report parameters as required, including the date range and VAT codes, and export the report.
- These reports will provide you with an overview of your VAT liability and can be used for tax filings.
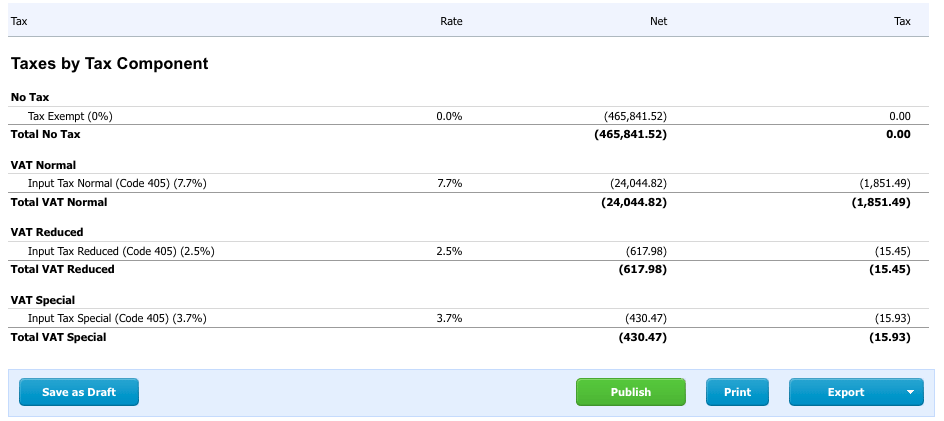
Step 6: Consider VAT reverse charge
Pull the Sales Tax Audit report in excel.
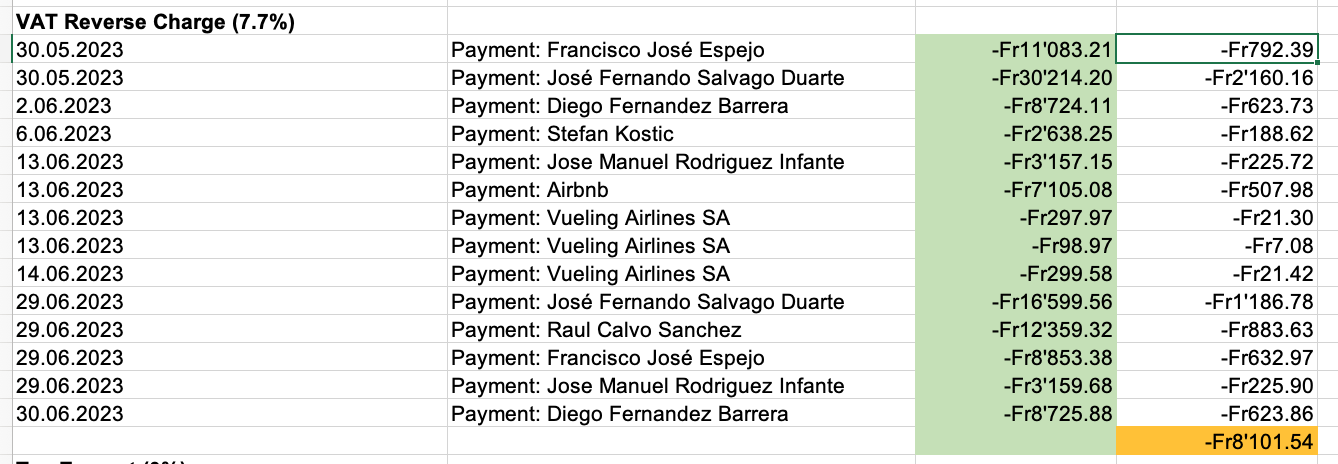
Multiply the individual transactions under VAT Reverse Charge 7.7% by 7.7% and total up the amounts.
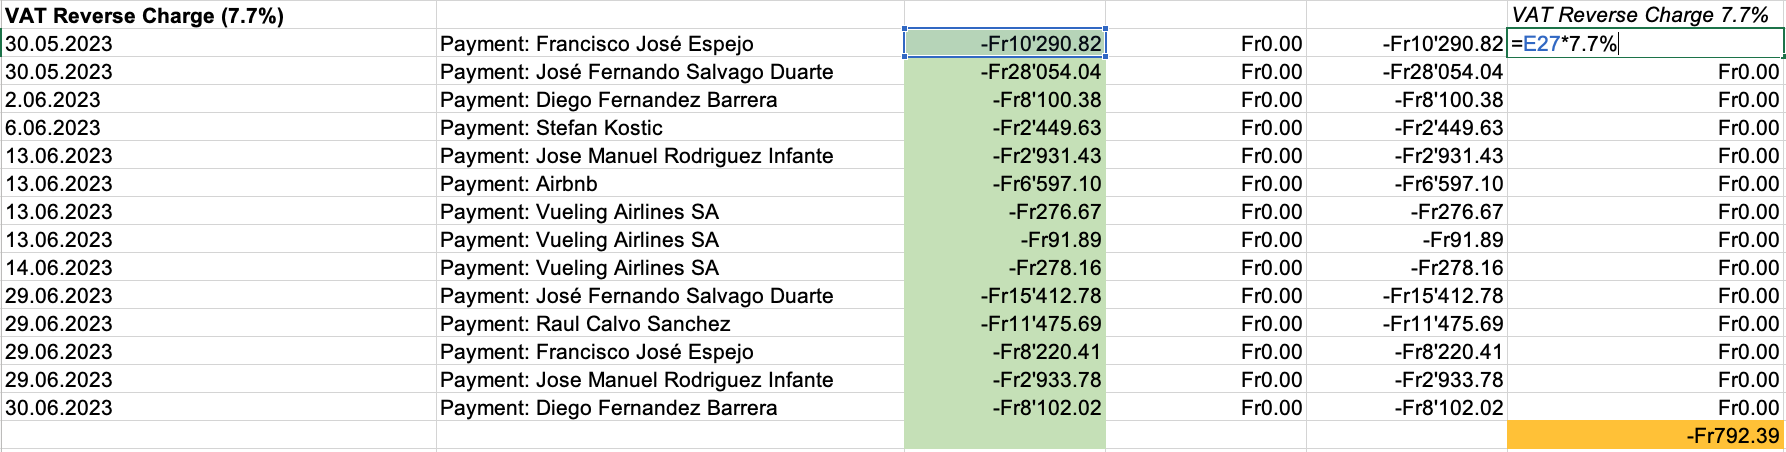
Add the total amount to your input and output VAT section of your VAT return so they offset. There is no field in the VAT return for Reverse Charge. The amount is just added to the Input VAT and Output VAT sections of the VAT Return.
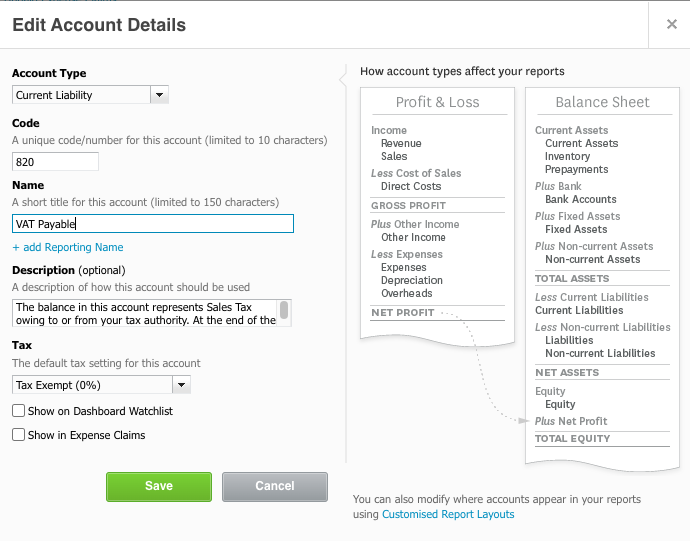
Step 7: Create a VAT Payable account on your balance sheet
There should be an account on your balance known as Sales Tax. Rename this account to VAT Reconciliation. In this account, you will reconcile your VAT for input and output VAT using a journal entry.
It should be a current liability account. To do this follow the below:
- Click on Accounting
- Click on Chart of Accounts
- Scroll down and find the Sales Tax account
- Click on it and rename it VAT Payable.
When you then receive the invoice from the authorities, you book it against your VAT Payable account to clear the account and then clear the payments of the VAT invoice in your Accounts Payable account to clear all accounts.
Conclusion
Setting up Swiss VAT on Xero accounting is crucial for businesses operating in Switzerland. By following the step-by-step guide outlined in this article, you can ensure accurate VAT calculations, maintain compliance with tax regulations, and streamline your financial processes. Remember to consult with a tax professional or refer to Swiss tax authorities for specific guidance based on your business activities.
.png)
.png)
.png)
